Android FCM
FCM push notifications setup
Below, we’ll show you how to send push notifications and/or push messages to your customers, with Firebase Cloud Messaging (FCM) in Intercom.
GCM Push Notifications
If you’d like to use GCM instead, the setup guide can be found here.
Step 1. Enable Google services for your app
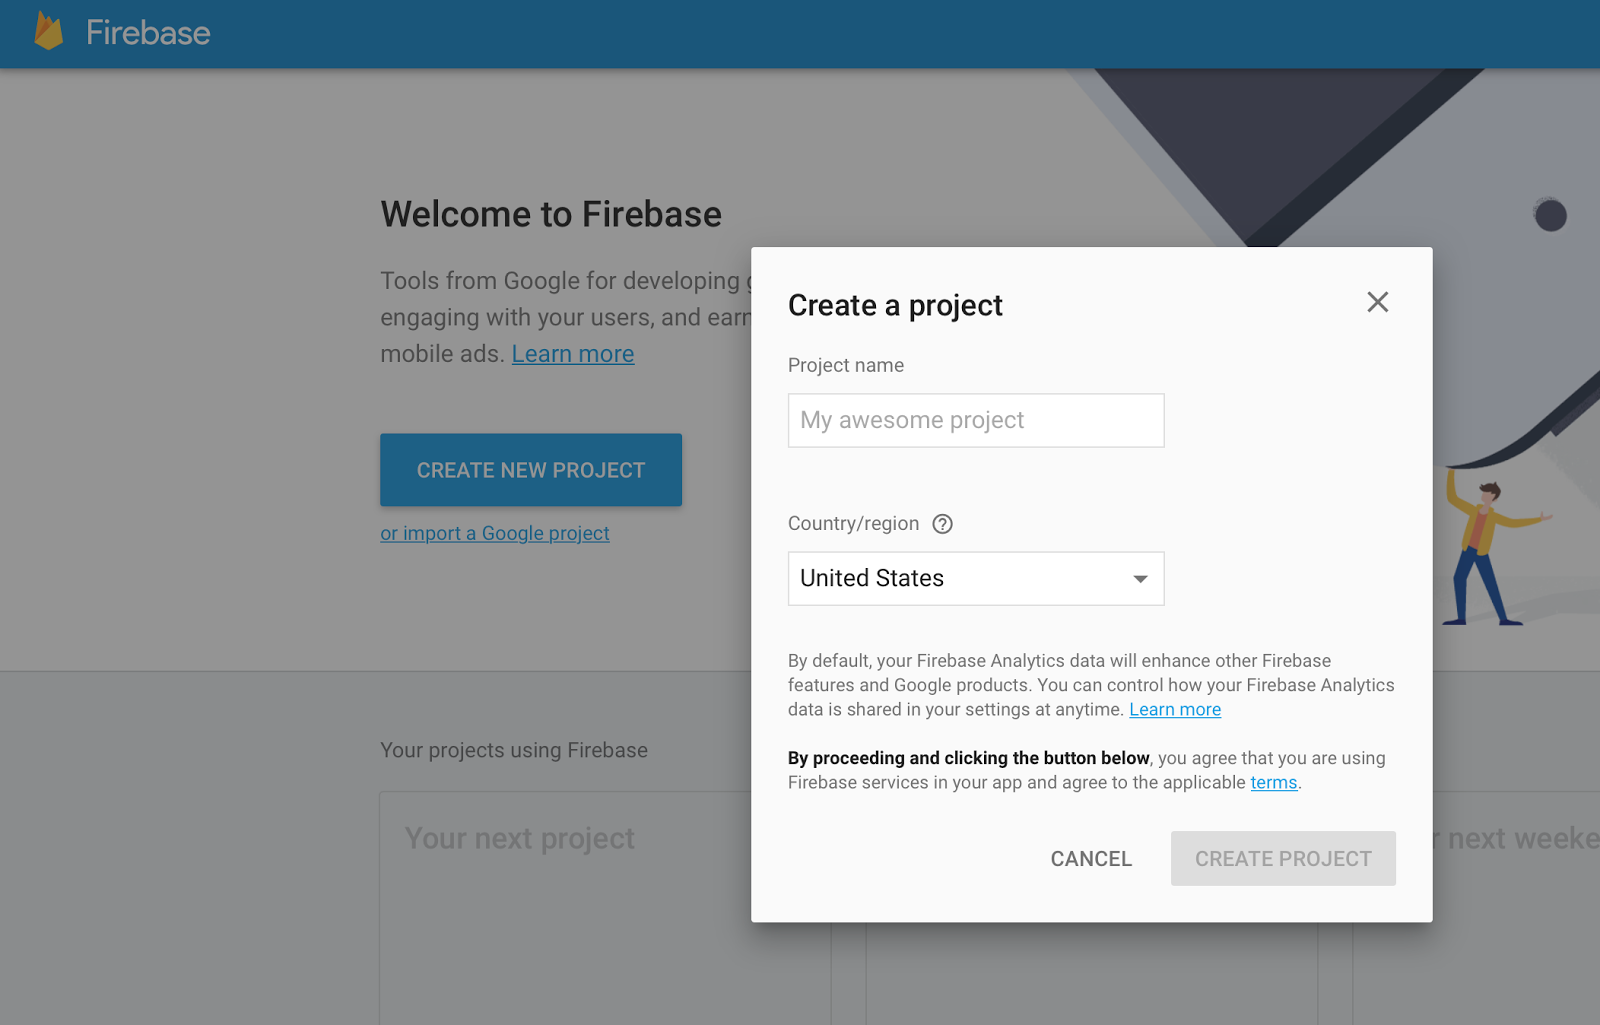
If you already have a Firebase project with notifications enabled you can skip to the next step. Otherwise go to the FCM Console page and create a new project following these steps:
Give the project a name and click ‘Create Project’.
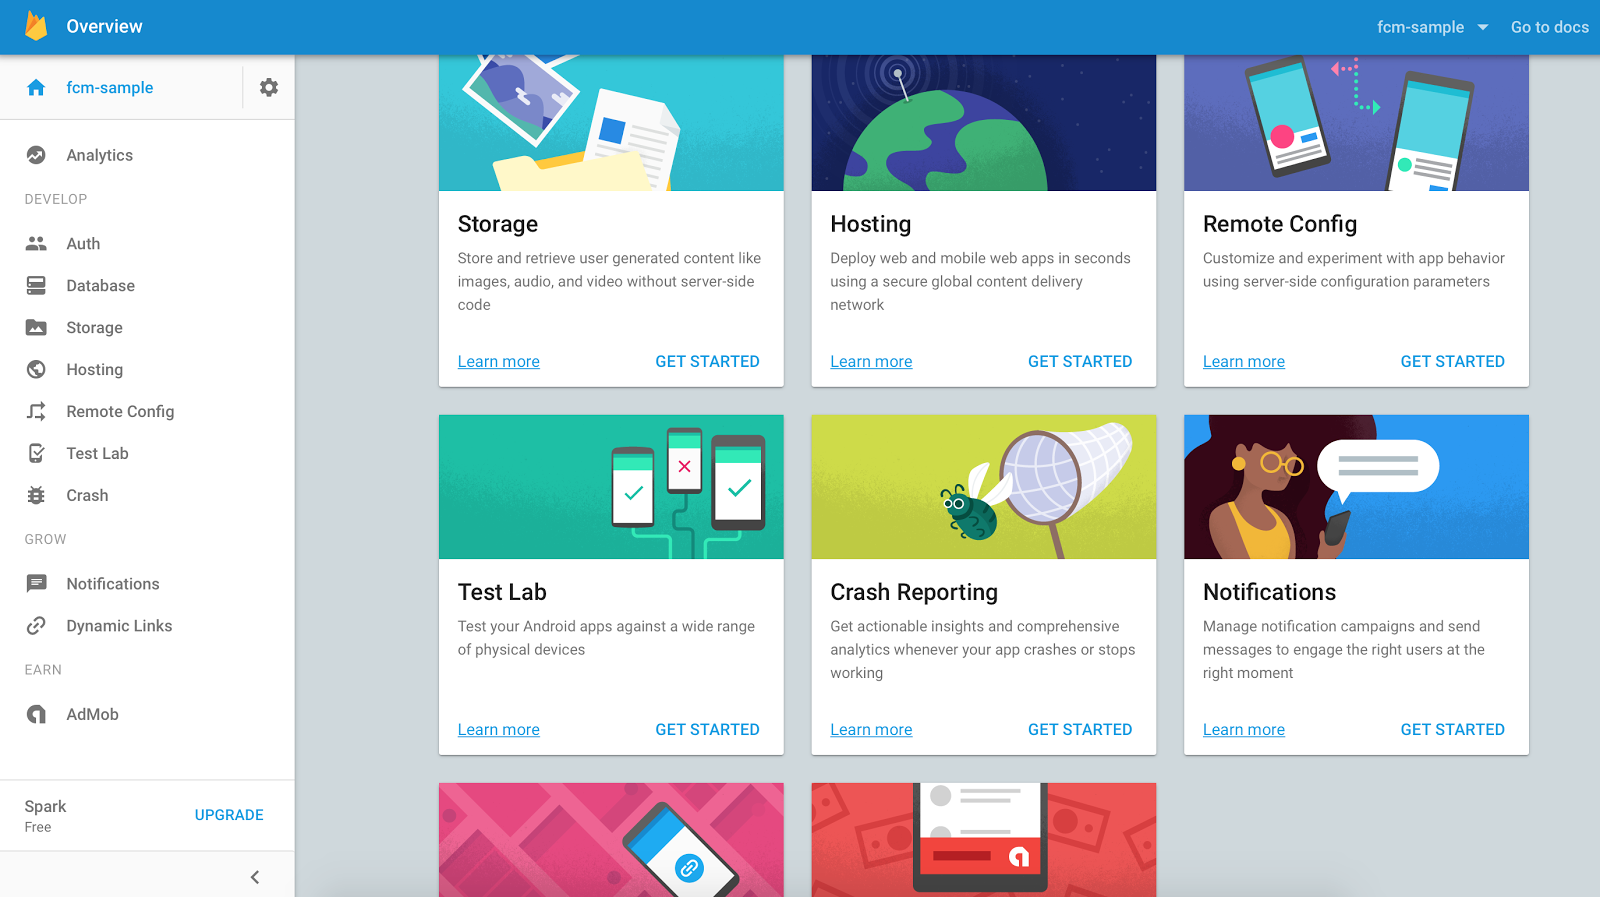
Once your project is set up, scroll down and select ‘Get started’ on the ‘Notifications’ card.
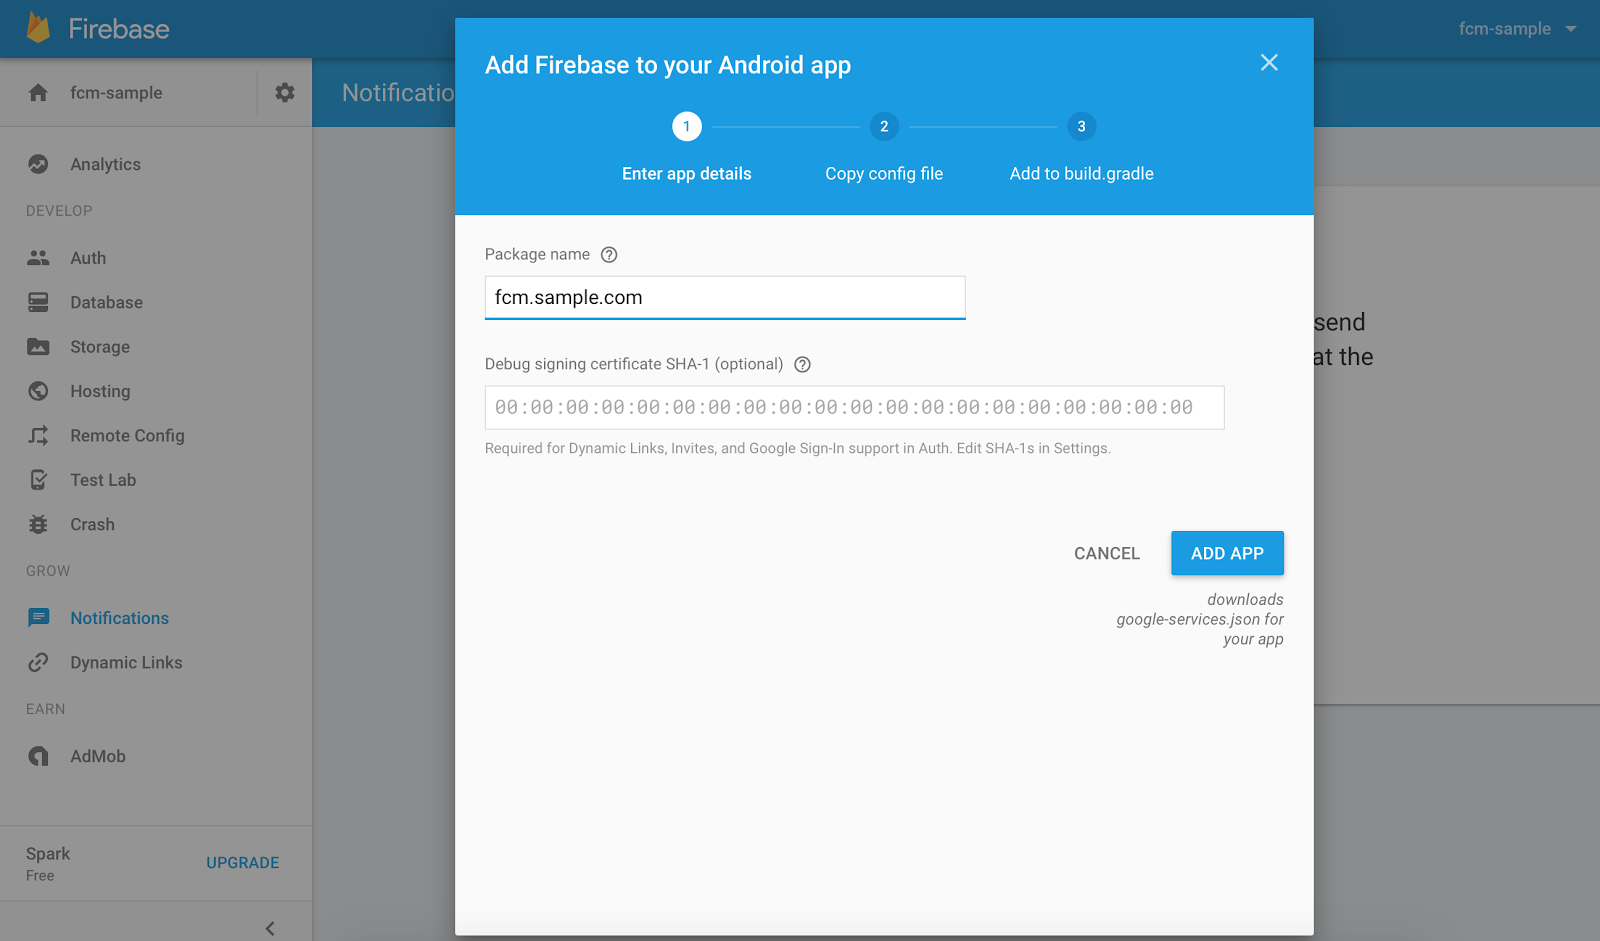
Enter your app’s package name and click ‘Add App’.
Step 2. Setup client to receive push
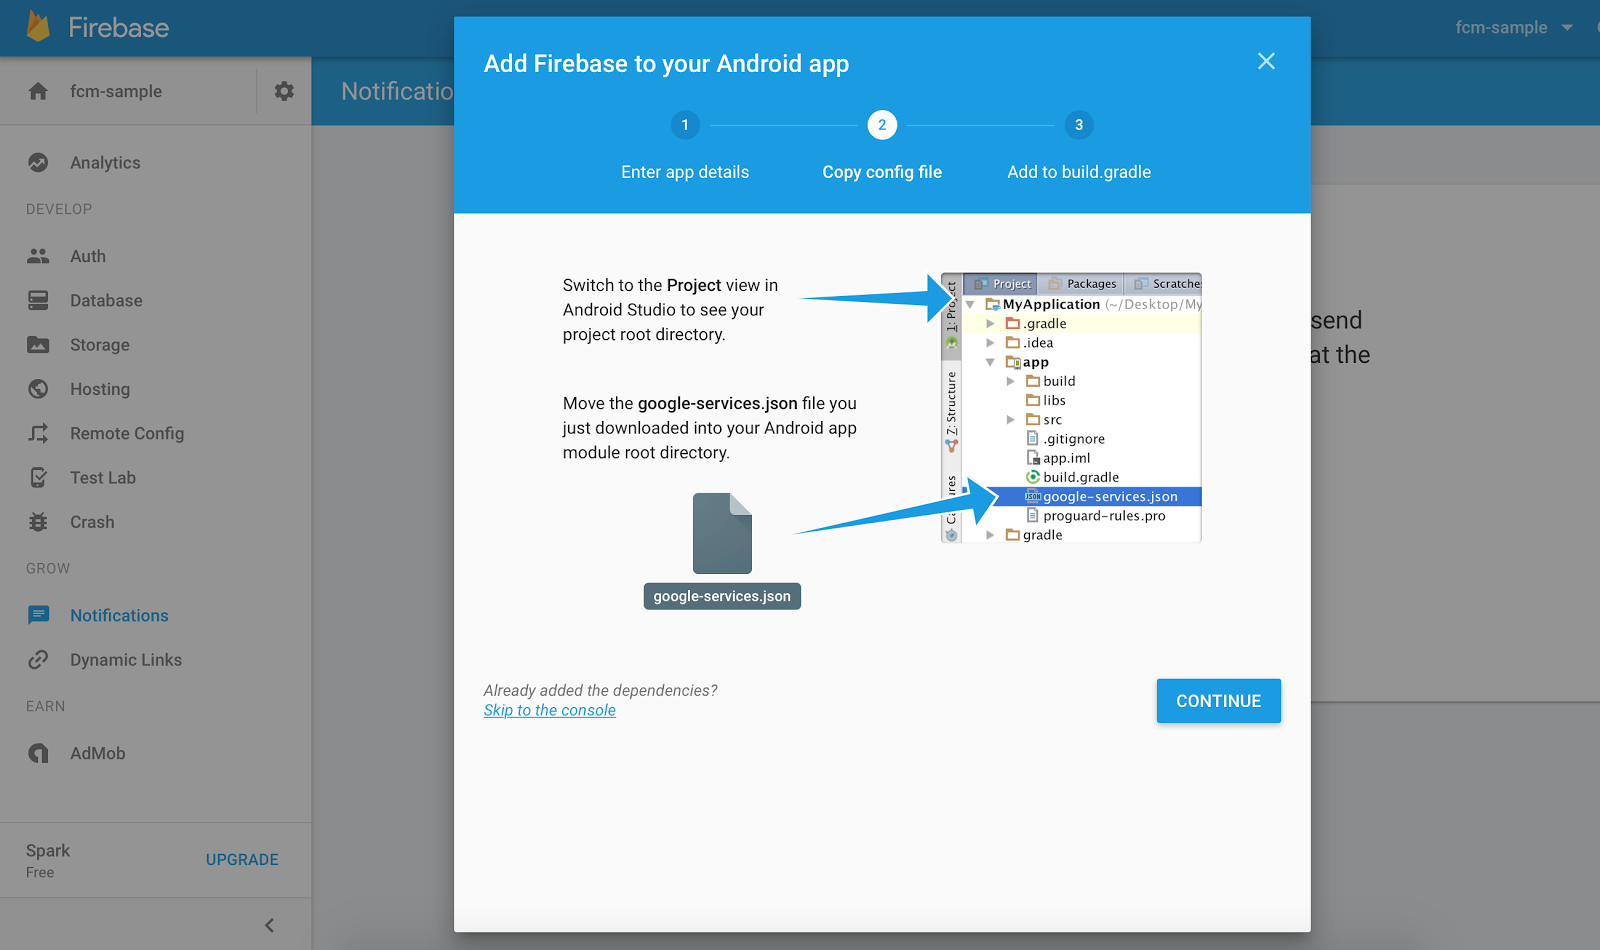
Your google-services.json should automatically download. You’ll need to move that into the same directory as your application level build.gradle.
In your apps build.gradle you will need to add the following lines to your dependencies:
dependencies {

    compile 'io.intercom.android:intercom-sdk-fcm:4.+'
    compile 'com.google.firebase:firebase-messaging:11.+'
}
At the bottom of your build.gradle you must add:
apply plugin: 'com.google.gms.google-services'
It is important that this is at the very end of the file.
Step 3. Add your Server key to Intercom for Android settings
Finally, click the settings cog and select ‘Project settings’, then ‘Cloud Messaging’ and copy your Server key.
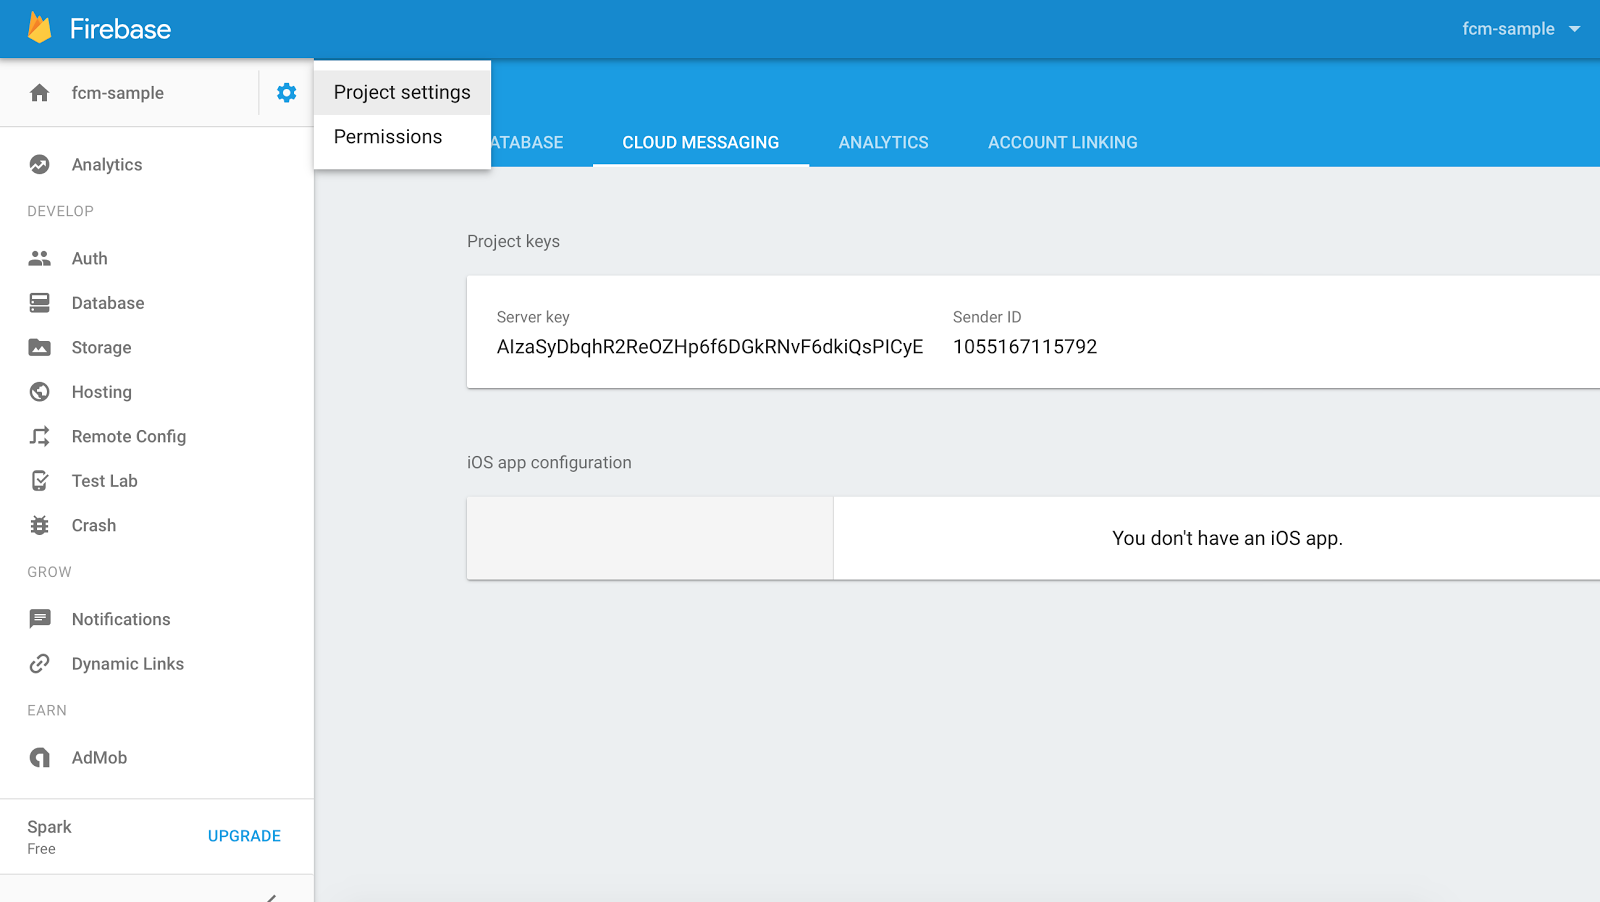
Open your Intercom app’s settings and select ‘Intercom for Android’. Then find the ‘Enable Google Cloud Messaging’ section. Here you'll be able to paste and save your Server API key.

Step 4. Setting your FCM icon
If you want to add a custom icon for your notifications, just add an image named intercom_push_icon.png to each of your supported densities. Please note that vector drawables cannot be used here. For example:
/res/drawable-xxhdpi/intercom_push_icon.png
/res/drawable-xhdpi/intercom_push_icon.png
/res/drawable-hdpi/intercom_push_icon.png
/res/drawable-mdpi/intercom_push_icon.png
Notifications icon design guidelines
We recommend following these material design guidelines for producing this icon.
Step 5. Open Intercom conversations from FCM
When a user taps on a push notification we hold onto data such as the URI in your message or the conversation to open. When you want Intercom to act on that data, just call:
Intercom.client().handlePushMessage();
Note
It’s important to wait for any splash screens or loading screens to finish before calling
handlePushMessageor your users might not have time to see the conversation we opened.
If you wish to create a custom back stack for this notification you can pass a TaskStackBuilder to the same method:
handlePushMessage(TaskStackBuilder stackBuilder);
Step 6. Disable push on log out
To stop users from receiving push messages when they have logged out of the app make sure Intercom.client().logout() is called.
Step 7. Using Intercom with other FCM setups (Optional)
This only applies to applications that also use FCM for their own content, or use a third party service for FCM. You’ll need to update your FirebaseInstanceIdService and FirebaseMessagingService.
You should have a class that extends FirebaseInstanceIdService. That service is where you get the device token to send to your backend to register for push. To register for Intercom push set up your FirebaseInstanceIdService like this:
private final IntercomPushClient intercomPushClient = new IntercomPushClient();

@Override public void onTokenRefresh() {
    String refreshedToken = FirebaseInstanceId.getInstance().getToken();
    intercomPushClient.sendTokenToIntercom(getApplication(), refreshedToken);
    //DO HOST LOGIC HERE
}
You should have a class that extends FirebaseMessagingService. That service will consume pushes intended for Intercom. To allow us to draw the Intercom push set up your FirebaseMessagingService like this:
private final IntercomPushClient intercomPushClient = new IntercomPushClient();

public void onMessageReceived(RemoteMessage remoteMessage) {
    Map message = remoteMessage.getData();
    if (intercomPushClient.isIntercomPush(message)) {
        intercomPushClient.handlePush(getApplication(), message);
    } else {
        //DO HOST LOGIC HERE
    }
}
Troubleshooting tips
If you’re having trouble getting FCM to work in your app, here's a list of things you should check:
- Make sure to tick the 'Send a push notification' box when you send a manual message.
- Check that the notifications are not disabled for your app on your test device. Settings > Sound & Notification > App notifications. This may differ depending on the Android version.
- Did you specify the correct Push Server API key?
- Make sure you added your
google-services.jsonfile in the correct directory.
And as always, you can contact us via Intercom. We're always here to help 😀
Updated almost 8 years ago